
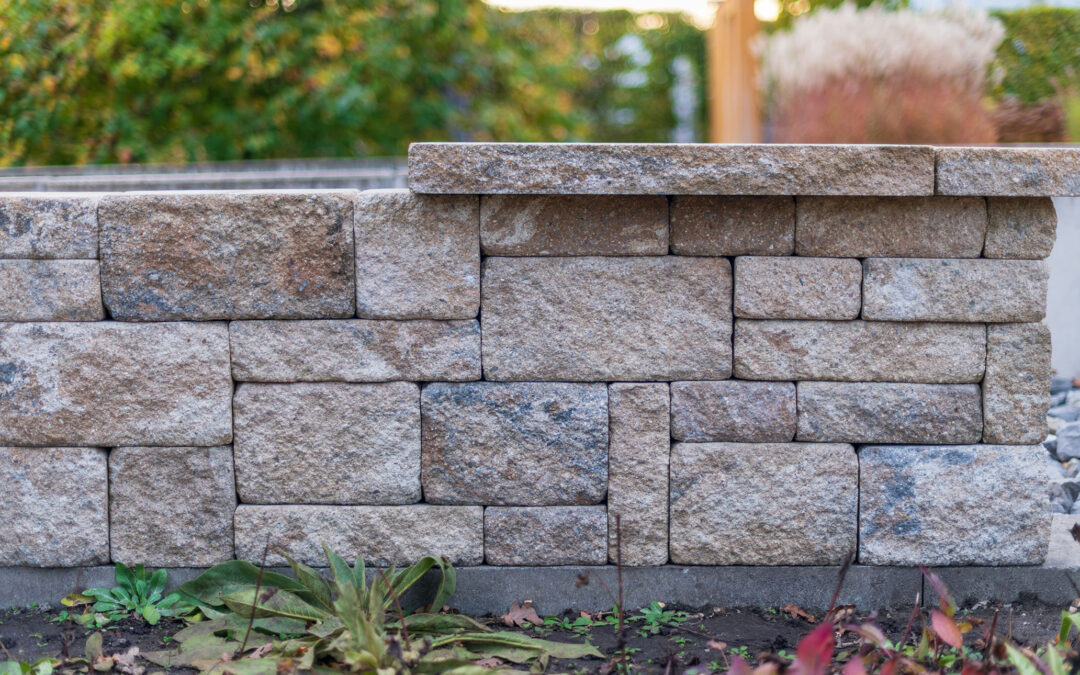
A retaining wall can solve several problems on a property. It can stabilize a slope, reduce erosion, create more usable ground, protect a driveway, improve drainage, or support a new road. However, a retaining wall must be designed for the conditions around it. A wall that looks solid from the outside can still fail if the soil, water, and pressure behind it are not properly addressed.
Water is one of the biggest threats to a retaining wall. When rainwater collects behind the wall, the added pressure can push the structure outward. Poor soil preparation, shallow footings, weak materials, and rushed construction can also cause a wall to lean, crack, or separate.
Building a dependable retaining wall requires careful planning from the ground up. The following tips explain what property owners should consider before construction begins.
Tips for Building a Good Retaining Wall
1. Identify the Purpose of Your Retaining Wall
Before choosing materials or planning the wall’s dimensions, determine exactly what the retaining wall needs to accomplish.
Some retaining walls are primarily decorative. Others must hold back a significant amount of soil and protect nearby structures. A wall supporting a driveway, road, building site, or steep hillside will require a different design than a short garden wall.
A retaining wall may be needed to:
- Stabilize a slope: A properly built wall can help prevent soil from sliding downhill.
- Control erosion: Retaining walls can slow soil movement caused by rain and runoff.
- Create usable space: A wall can turn a sloped section of land into a flatter yard, parking area, or building site.
- Protect a driveway or road: Walls can support the ground beside an access road or prevent soil from washing onto the driving surface.
- Improve landscaping: Terraced walls can create planting areas and better define sections of the property.
- Redirect water: A well-planned wall can work with drainage improvements to move runoff away from vulnerable areas.
Understanding the purpose of the wall helps determine its height, width, materials, reinforcement, and drainage requirements.
2. Study the Slope and Soil Before Building a Retaining Wall
Every slope behaves differently. Soil type, moisture levels, vegetation, underground water, and the steepness of the land can all affect the amount of pressure placed on a retaining wall.
Dense clay soil can hold large amounts of water and expand when wet. Loose or sandy soil may drain more easily, but it can also shift if it is not compacted correctly. Soil containing roots, organic material, or construction debris may not provide a stable base.
The slope above the wall also matters. A steep hill will place more pressure on the structure than a gentle grade. Additional weight from parked vehicles, equipment, buildings, or stored materials can increase that pressure even further.
A contractor should evaluate the full site instead of focusing only on the exact location where the wall will be installed.
3. Plan Retaining Wall Drainage From the Beginning
Drainage should be part of the retaining wall design, not an improvement added after water problems appear.
Rainwater naturally moves downhill and can collect in the soil behind a wall. As the soil becomes saturated, it grows heavier and creates hydrostatic pressure. Without a way to escape, that pressure can cause the wall to bow, lean, crack, or collapse.
Common retaining wall drainage features include:
- Gravel or clean stone behind the wall
- Perforated drainage pipe
- Filter fabric that helps keep soil out of the stone
- Weep holes that allow trapped water to exit
- Grading that directs surface water away from the wall
- Swales, French drains, or other drainage systems nearby
The drainage outlet also needs careful placement. A pipe that simply releases water at the bottom of a slope may create erosion somewhere else on the property.
4. Build a Strong and Level Retaining Wall Base
The strength of a retaining wall depends heavily on the base beneath it. Even quality wall materials can shift if they are placed on loose soil, mud, tree roots, or an uneven trench.
The construction area should be excavated to the proper depth. Weak soil and organic material should be removed. A layer of compacted stone can then provide a solid, level surface for the first course of the wall.
The bottom row is especially important because every additional layer depends on it. Small errors at the base become more noticeable as the wall gets taller.
A properly prepared base helps prevent:
- Uneven settling
- Cracks between wall sections
- Forward leaning
- Separation between blocks
- Low spots that collect water
- Movement during freeze and thaw cycles
Taking more time during base preparation can reduce the risk of expensive repairs later.
5. Choose Retaining Wall Materials for the Property
Retaining walls can be built with concrete blocks, poured concrete, natural stone, pressure-treated timber, large boulders, or other engineered systems. The right material depends on the wall’s height, function, appearance, budget, and surrounding conditions.
Segmental concrete blocks are commonly used because they can be installed in layers and reinforced when necessary. Poured concrete can work well for heavily engineered walls but requires proper forms, reinforcement, and drainage. Natural stone can fit rural and mountain properties, although its irregular shape requires careful placement.
Timber may be appropriate for certain shorter walls, but wood will eventually be affected by moisture and decay. Large boulders can help stabilize some slopes, especially when combined with grading, erosion control, and proper drainage.
Material selection should be based on structural demands first. Appearance is important, but it should not come at the expense of strength or safety.
6. Give the Retaining Wall the Proper Setback
Many retaining walls are designed with a slight backward lean, known as batter. Segmental blocks may create this setback automatically as each course is installed.
The wall should lean into the retained soil rather than standing completely vertical or leaning outward. This design helps the structure resist pressure from the slope.
The correct setback depends on the wall system, height, soil conditions, and engineering requirements. Improvising the angle can weaken the wall, so manufacturer specifications or professional plans should be followed carefully.
A wall that begins leaning forward shortly after construction may have an inadequate base, poor drainage, weak reinforcement, or excessive pressure behind it.
7. Use Reinforcement for Taller Retaining Walls
Short landscaping walls may rely mainly on their own weight. Taller walls often need additional reinforcement to connect the structure to the soil behind it.
Some walls may require steel reinforcement, concrete footings, anchors, or specially engineered block systems. The correct method will depend on the wall design.
Reinforcement becomes especially important when a retaining wall is located near:
- A driveway
- A private road
- A parking area
- A building
- A steep slope
- Heavy equipment access
- A drainage channel
- A property boundary
Ignoring the weight above or behind the wall can result in a design that is not strong enough for the site.
8. Compact the Soil Behind the Retaining Wall
Backfill should usually be installed and compacted in smaller layers. Dumping a large amount of loose soil behind the finished wall can lead to settling and uneven pressure.
Compaction helps create consistent support while reducing empty spaces in the soil. However, the equipment used for compaction must be appropriate for the wall. Heavy machinery operated too close to the structure can place excessive pressure on it.
Clean drainage stone should be placed where the design requires it. Soil and stone should not be mixed carelessly because sediment can clog drainage pathways.
The top of the backfill should also be graded so surface water flows away from the wall instead of entering the soil directly behind it.
9. Consider Terracing Instead of One Tall Retaining Wall
A single tall wall is not always the best way to manage a steep property. In some situations, two or more shorter terraced walls may provide better stability and create a more natural appearance.
Terracing can divide the total soil pressure between several structures. It can also create flat areas for plants, walking paths, drainage features, or maintenance access.
The spacing between walls is important. Placing an upper wall too close to the lower wall may cause both walls to behave like one taller structure. The lower wall must then support additional weight that may not have been included in the original design.
A professional site plan can determine whether terracing is suitable and how much space should be left between each wall.
10. Protect the Retaining Wall From Surface Runoff
A retaining wall cannot solve every drainage problem by itself. Water flowing across the ground above the wall must be controlled before it reaches the structure.
Roof runoff, clogged ditches, steep driveways, compacted yards, and poorly graded building sites can send large volumes of water toward a wall. During heavy rain, this runoff may wash over the top, erode the soil, or overwhelm the drainage system.
Surface water may need to be redirected with grading, berms, swales, catch basins, culverts, French drains, or extended downspouts.
The goal is to manage water across the entire property rather than expecting the wall to withstand a constant flow of uncontrolled runoff.
11. Check Retaining Wall Permits and Engineering Requirements
Retaining wall requirements vary depending on location, wall height, nearby structures, and the amount of weight the wall will support.
A permit or engineered design may be required for taller walls. Engineering may also be necessary when the wall supports a driveway, road, building, steep slope, or other surcharge load.
Property owners should also confirm boundary lines and check for underground utilities before excavation begins. Skipping these steps can create safety problems and may lead to costly changes after construction has already started.
12. Hire a Contractor Who Understands Grading and Drainage
Retaining wall construction involves more than stacking blocks or placing stones. The contractor needs to understand excavation, soil behavior, compaction, drainage, slope stabilization, and equipment operation.
A contractor should evaluate how the wall connects to the rest of the property. That includes reviewing nearby roads, driveways, buildings, drainage channels, and natural slopes.
We help property owners plan and build retaining walls that address the actual conditions on the site. We also provide grading, drainage improvements, French drains, road building, land clearing, storm cleanup, and other land services.
Choose Foothills Land Services for Retaining Walls and New Roads
A good retaining wall should control soil, manage water, and remain stable through changing weather conditions. That requires a solid base, dependable drainage, appropriate materials, proper reinforcement, and careful grading around the finished structure.
Foothills Land Services can evaluate your property and develop a practical plan for your retaining wall, drainage system, driveway, or private road. Whether you need to stabilize a hillside, protect an access road, create more usable space, or prepare land for future construction, our team can handle the excavation and site work required.
Contact Foothills Land Services to discuss your retaining wall project or begin planning a new road on your property.